Turf provides statistical methods to compare the usability of different products. Also available within Turf are comparative tests including: two-sample ttest or Mann-Whitney U test to compare two groups of samples and one-way ANOVA to compare three or more groups of samples.
Compare Task Time with Pivot Table/Chart
Step1: Query task time
- Go to Analyze tab
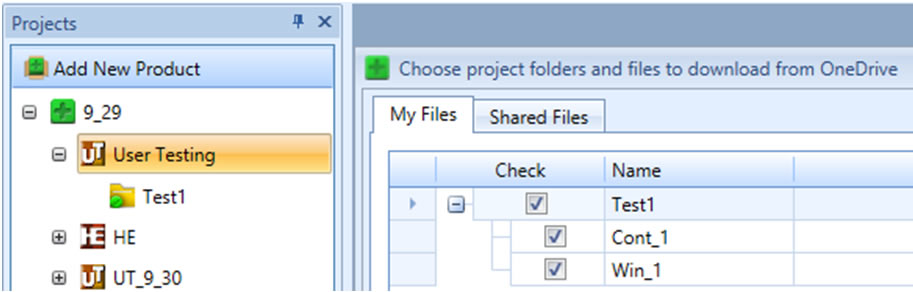
- Click Query Files button
- Select a Product, e.g. Demo EHR -> Select a project, e.g. Heuristic Evaluation 1 -> Select a folder, e.g.: Electronic prescribing ->
- Select windows event files, e.g., Win_1 to Win_10
- Select Task time
- Click OK

Step2: Add categorical columns
Step2: Add categorical columns
-Right click on Task time column header and click Insert Column
-Enter Column Name, e.g., Product Name
-Enter EHR 1 for the first five rows of Product Name Column to indicate it’s Product 1, enter EHR 2 for the last five rows of Product Name Column to indicate it’s Product 2
-Click OK
Use the same steps to add another column named User Group.

Step3: Switch to pivot table and chart
- Click Switch to Pivot Table/Chart button
- Put your mouse over Data Headers
- Drag Product Name button to Drop Row Field Here, drag User Group button to Drop Column Fields Here and drag Name button to Drop Filter Fields Here
Compare Task Time with One-way ANOVA
Step1: Query task time
- Go to Analyze tab
- Click Query Files button
-Select a Product, e.g. Demo EHR -> Select a project, e.g. Heuristic Evaluation 1 -> Select a folder, e.g.: Electronic prescribing ->
- Select windows event files, e.g., Win_1 to Win_10
- Select Task time
- Click OK
Step2: Add categorical columns
- Right click on Task time and click Insert Column
- Right click on Task time and click Insert Column
- Enter
- Right click on Task time and click Insert Column
- Enter Column Name, e.g., Product Name
- Click OK
- Enter EHR 1 for the first three rows of Product Name Column to indicate it’s Product 1, enter EHR 2 from the fourth to sixth rows of Product Name Column to indicate it’s Product 2, enter EHR 3 for the last four rows of Product to indicate it’s Product 3

Step3: Choose variables and calculate
- Select Product Name and Task time Column
- Click One-way ANOVA button
- Add Product Name as Factor
- Add Task time to the Dependent list
- Click OK

Compare Task Time with Mann-Whitney UTest
Step1: Query task time
- Go to Analyze tab
- Click Query Files button
- Select a Product, e.g. Demo EHR -> Select a project, e.g. Heuristic Evaluation 1 -> Select a folder, e.g.: Electronic prescribing ->
- Select windows event files, e.g., Win_1 to Win_10
- Select Task time
- Click OK
Step2: Add categorical columns
- Right click on Task time and click Insert Column
- Enter Column Name, e.g., Product Name
- Click OK
- Enter EHR 1 for the first five rows of Product Name Column to indicate it’s Product 1, enter EHR 2 for the last five rows of Product Name Column to indicate it’s Product 2

<
Step3: Choose variables and calculate
- Select Product Name and Task time Column
- Click Mann-Whitney U button
- Add Product Name as Group Variable
- Choose EHR 1 for Group 1, choose EHR 2 for Group 2
- Add Task time to the Test Variable(s) list
- Click OK

Compare Task Time with Two-Sample t Test
Step 1: Query task time
- Go to Analyze tab
- Click “Query Files” button
- Select a Product, e.g. Demo EHR -> Select a project, e.g. Heuristic Evaluation 1 -> Select a folder, e.g.: Electronic prescribing ->
- Select windows event files, e.g., Win_1 to Win_10
- Select Task time
- Click OK
Step2: Add categorical columns
- Right click on Task time and click Insert Column
- Enter Column Name, e.g., Product Name
- Click OK
- Enter EHR 1 for the first five rows of Product Name column to indicate its Product 1, enter EHR 2 for the last five rows of Product Name Column to indicate it’s Product 2
Step3: Choose variables and calculate
- Select Product Name and Task time Column
- Click Two-Sample t button.
- Add Product Name as Group Variable
- Select Product Name and Task time Column
- Click Two-Sample t button.
- Add Product Name as Group Variable
- Choose EHR 1 for Group 1, choose EHR 2 for Group 2
- Add Task time to the Test Variable(s) list.
- Select Unpaired and None
- Select Product Name and Task time Column
- Click Two-Sample t button.
- Add Product Name as Group Variable
- Select Product Name and Task time Column
- Click Two-Sample t button.
- Add Product Name as Group Variable
- Choose EHR 1 for Group 1, choose EHR 2 for Group 2
- Add Task time to the Test Variable(s) list.
- Select Unpaired and None
- Click OK
- Select Product Name and Task time Column
- Click Two-Sample t button.
- Add Product Name as Group Variable
- Select Product Name and Task time Column
- Click Two-Sample t button.
- Add Product Name as Group Variable
- Choose EHR 1 for Group 1, choose EHR 2 for Group 2
- Add Task time to the Test Variable(s) list.
- Select Unpaired and None
- Select Product Name and Task time Column
- Click Two-Sample t button.
- Add Product Name as Group Variable
- Select Product Name and Task time Column
- Click Two-Sample t button.
- Add Product Name as Group Variable
- Choose EHR 1 for Group 1, choose EHR 2 for Group 2
- Add Task time to the Test Variable(s) list.
- Select Unpaired and None
- Click OK- Select Product Name and Task time Column
- Click Two-Sample t button.
- Add Product Name as Group Variable
- Select Product Name and Task time Column
- Click Two-Sample t button.
- Add Product Name as Group Variable
- Choose EHR 1 for Group 1, choose EHR 2 for Group 2
- Add Task time to the Test Variable(s) list.
- Select Unpaired and None
- Select Product Name and Task time Column
- Click Two-Sample t button.
- Add Product Name as Group Variable
- Select Product Name and Task time Column
- Click Two-Sample t button.
- Add Product Name as Group Variable
- Choose EHR 1 for Group 1, choose EHR 2 for Group 2
- Add Task time to the Test Variable(s) list.
- Select Unpaired and None
- Click OK
- Select Product Name and Task time Column
- Click Two-Sample t button.
- Add Product Name as Group Variable
- Select Product Name and Task time Column
- Click Two-Sample t button.
- Add Product Name as Group Variable
- Choose EHR 1 for Group 1, choose EHR 2 for Group 2
- Add Task time to the Test Variable(s) list.
- Select Unpaired and None
- Select Product Name and Task time Column
- Click Two-Sample t button.
- Add Product Name as Group Variable
- Select Product Name and Task time Column
- Click Two-Sample t button.
- Add Product Name as Group Variable
- Choose EHR 1 for Group 1, choose EHR 2 for Group 2
- Add Task time to the Test Variable(s) list.
- Select Unpaired and None
- Click OK


 to 4 (Catastrophic)")